In this guide, I’ll share my process on how I attached my favorite pastel paper onto a wood panel. Please note that I do not have experience using materials other than the ones I list here. If you are interested in attaching watercolor paper, bristol, canvas, etc. to wood or other hard surfaces, I would recommend experimenting on a small test surface to verify compatibility with the adhesive and sealant.
As an Amazon Associate, I earn a small commission from qualifying purchases. Product links may include affiliate links. If you choose to use an affiliate link to shop for art supplies, your support helps keep this site ad-free!
Why mount paper to boards?
Added Stability
Paper is a very common surface to work on for watercolor, pastel, graphite, and charcoal artists. Unfortunately, paper can easily be accidently bent or damaged in transit. Mounting your favorite paper to a sturdier surface such as a wood panel can make it easier to work outdoors (plein air painting) and be a safer way to ship finished artwork.
Avoid Paper Warping
If you use solvents for your underlayers as a pastel artist or you work in washes as a watercolor artist, you don’t have to worry about taping the sides of your paper down if it’s securely attached to a panel.
Budget
Many brands offer panels with different surfaces for artists working in dry mediums. However, these can be pricey. If you’re on a budget, unfinished panels are nearly always cheaper than the pre-primed surfaces. It may be worthwhile to spend an afternoon priming a batch of boards yourself and you’ll be set for months of making beautiful artwork.
Process Overview:
The first step will be to seal the surface of the panel. Your panel may be MDF, Masonite, or wood. The purpose of the sealant is to prevent any chemicals in the wood from leaching into your drawing surface. Similar to how you would prime your home walls prior to painting, sealing your panel surface will provide the best conditions for the next step. If you skip the sealing step, you have the risk of the pH balance being affected on your artwork. It may not be apparent in a month, but years down the line, pH imbalances can lead to discoloration and staining.
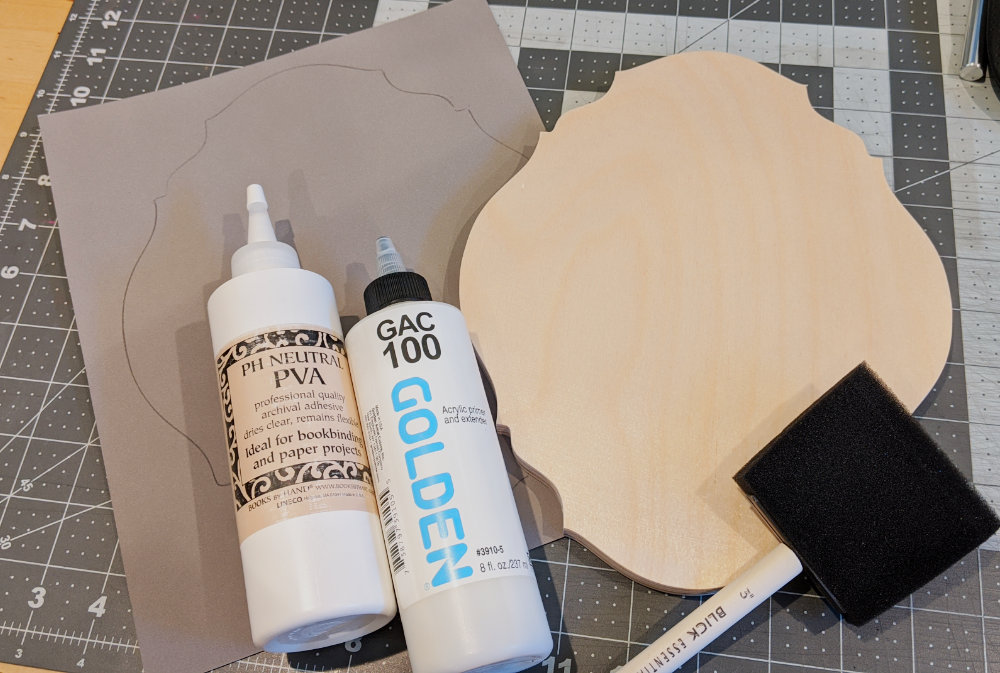
The second step is focused on adhering your paper onto the panel. Cut the paper to be either the same size as your panel or slightly larger. The Lineco PVA glue dries fairly slowly so you’ll have a few minutes to position your paper before it begins setting. To ensure that your paper dries completely flat, use several heavy books to weigh down the paper as it dries. Allow the glue to dry at minimum overnight but ideally 2 full days.
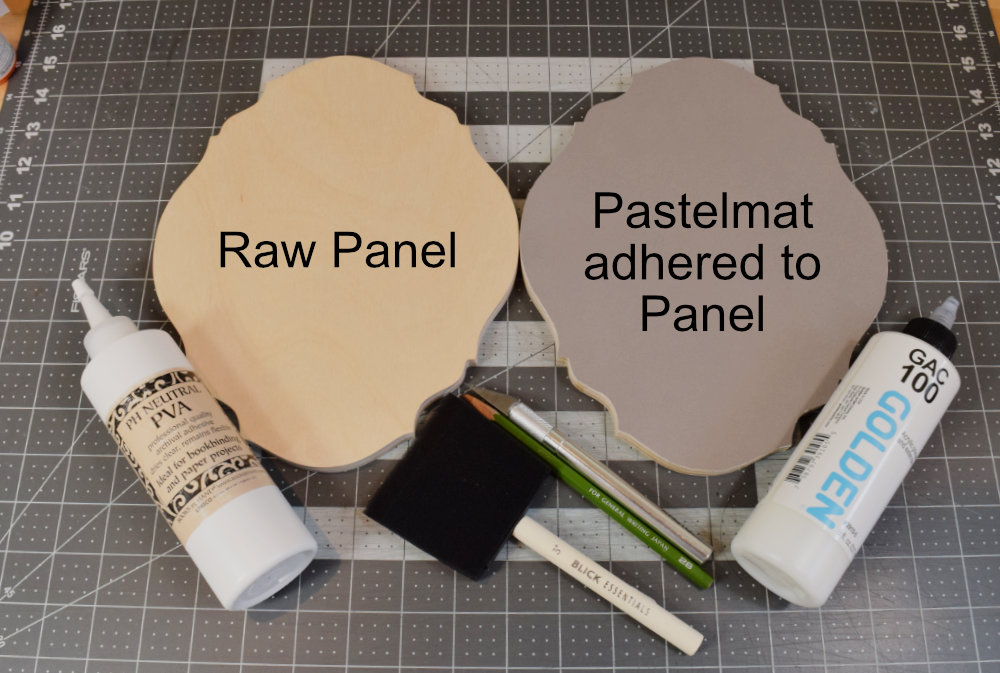
Materials:
- Wood Sealant – Golden GAC 100
- Adhesive – Lineco PVA bookbinding glue
- Wood panel – Trekell ½ inch raw Baltic birch panel (see coupon code below). [Note the current panel I purchased is no longer available, but I have linked Trekell’s available panels.]
- Paper – Clairefontaine Pastelmat in Dark Grey
Save $5 on your next Trekell order! I also receive a credit from Trekell when you use the link below:
Tools:
- Foam brush – 2 or 3 inches wide
- Interleaving paper such as glassine or tracing paper
- Craft knife – X-acto No. 2.
- Heavy books (5 pounds or heavier)
Instruction:
Total project time: 1 day
Active time: 2 hours
- Prepare your materials. Cut the paper to the same size or slightly larger than your panel. Have your wood sealant and foam brush ready.
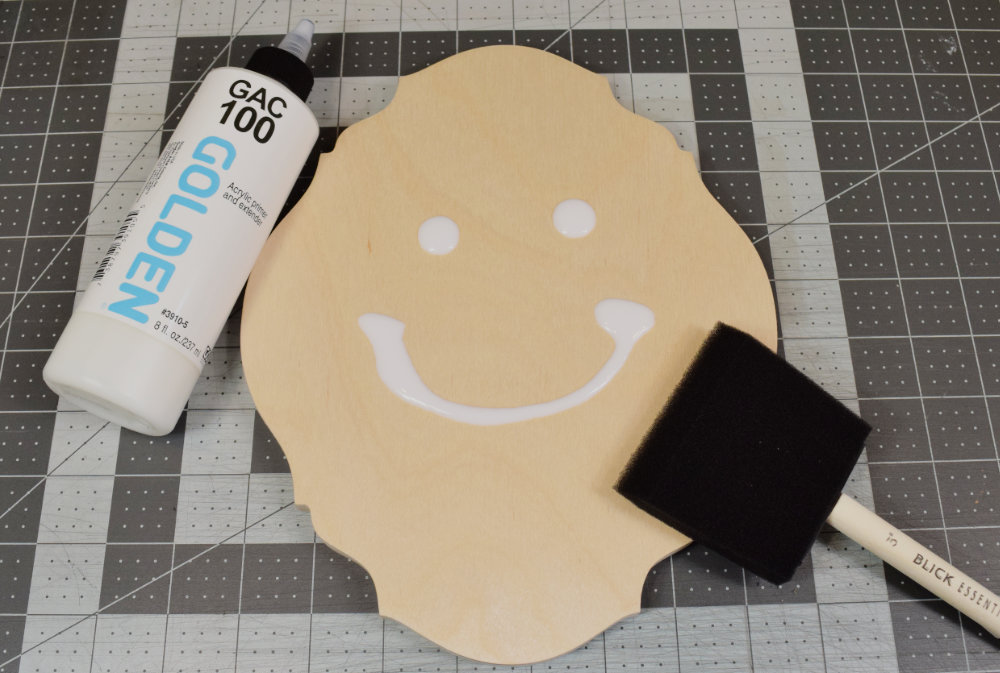
- Apply the first layer of wood sealant to the panel. Start with a small amount (approximately 1-2 teaspoons per square foot) and spread the sealant with the foam brush. Add more if needed to evenly coat the entire surface. The panel surface will change from matte to glossy when the sealant is applied.
- Allow the wood sealant to dry completely (approximately 30 minutes). Rinse the foam brush with water to remove any sealant residue.
- Repeat steps 2 & 3 for the second coat of sealant.
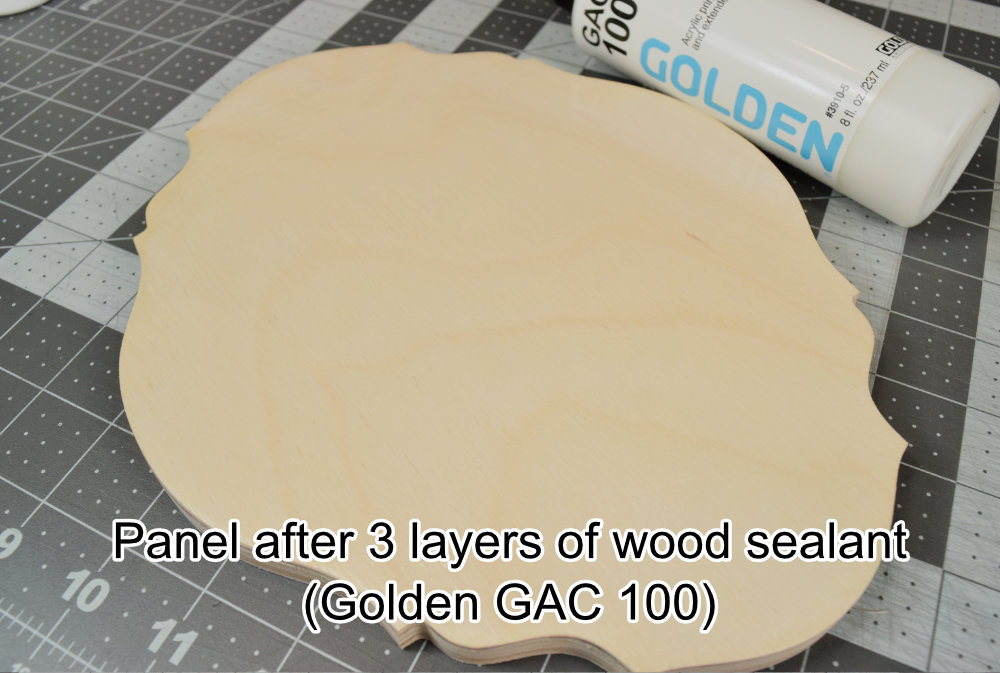
- If needed, apply a third coat of sealant. A third coat is only necessary if the surface feels uneven.
- Apply the PVA glue. Using the same foam brush, spread the PVA glue evenly on the panel and pay extra attention to the edges where the paper is most likely to lift. The amount of PVA glue will be similar to the quantity of sealant used in step 2.
- Align and attach your paper onto the panel. The PVA glue takes a few minutes to become tacky so there is time to adjust the paper into place.
- Weigh the panel down as it dries. My setup includes a protective glassine sheet between the paper and books to prevent damage to the paper.
- Rinse the PVA glue from the foam brush.
- Wipe off any excess PVA glue from the edges of the panel with a damp paper towel. The PVA glue is water-based for easy clean-up.
- After 24-48 hours, remove the weights and inspect the surface and edges of the paper. If the edges of the paper are lifting, use a flexible paint palette knife to apply additional PVA glue to the panel, reapply the weights, and let dry for one day.
- If your paper is larger than your panel, trim off any excess with a craft knife.
- Make art!
Did you find this post helpful? Let me know in the comments below.