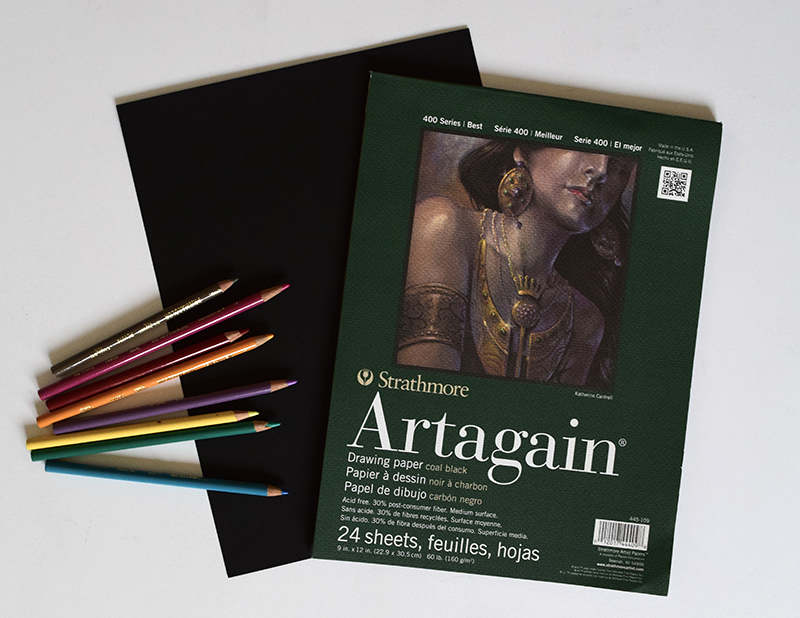
So maybe you want to give black paper a try. I think that’s great! Most art stores carry either Strathmore 400 Series Artagain Pad (9”x12”, MSRP $10 USD, 24 sheets) or Canson XL Series Black Drawing Paper (7″x10”, MSRP $11 USD, 40 Sheets). And chances are you probably have some colored pencils lying around from elementary school. Here are some of the things I’ve learned after using black paper and hopefully you can use these tips to get a ‘jump-start’ to this fun media as well.
As an Amazon Associate I earn a small commission from qualifying purchases. Product links may include affiliate links. If you choose to use an affiliate link to shop for art supplies, your support helps keep this site ad-free!
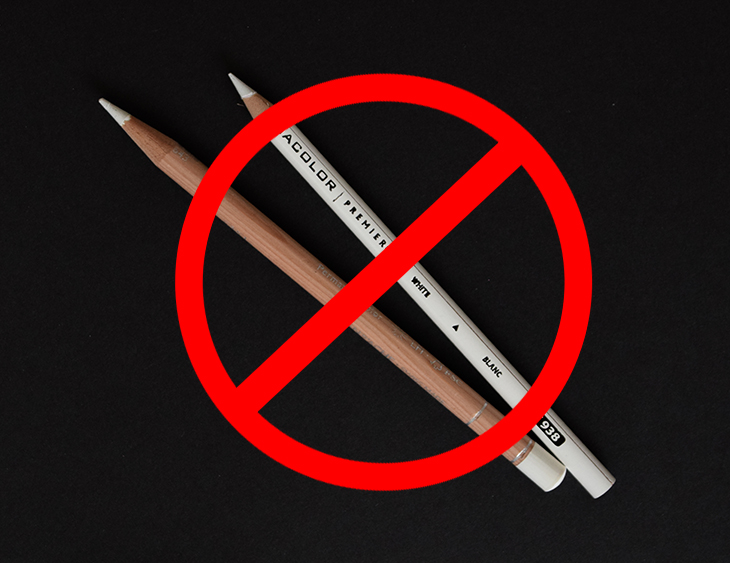
1. Save your white for last
Wait, what? Yes, you heard me. Hide your white colored pencil until the very end of your drawing. It’s very tempting to grab the white and draw in the brightest areas, but with darker paper, it’s more important to build up from dark to light values. Treat white as a very precious commodity that you want to use only on the brightest highlights.
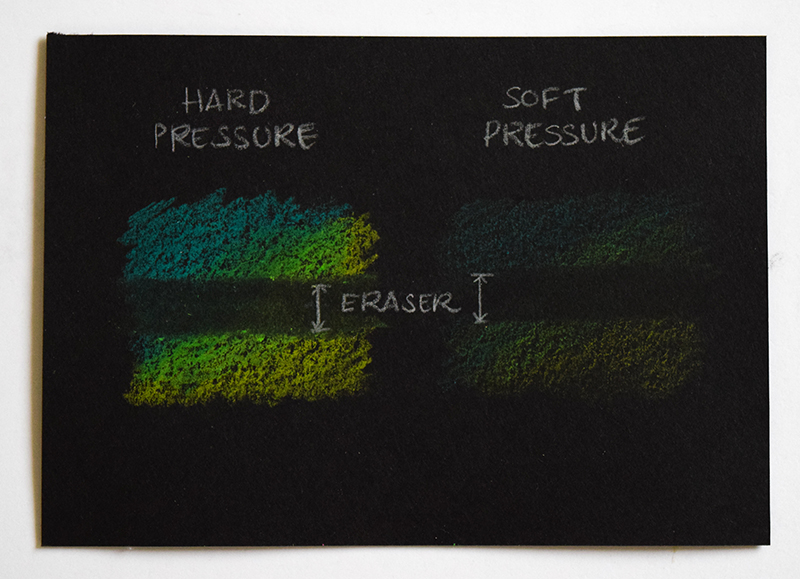
2. Work in light layers
The name “colored pencil” infers that you can erase marks like a regular pencil but this is not true. If you’re heavy handed and put a lot of pressure when drawing, these marks will not erase completely. If you apply light pressure, it’s easy to erase mistakes and you also have to ability to layer colors which is very important if you’re aiming for realism.
Keeping a soft eraser on hand will allow you to lighten some of your marks. I use the Pentel Clic Retractable Eraser (MSRP approx. $2 USD) – which is a slim refillable eraser and has been my go-to eraser for well over a decade.
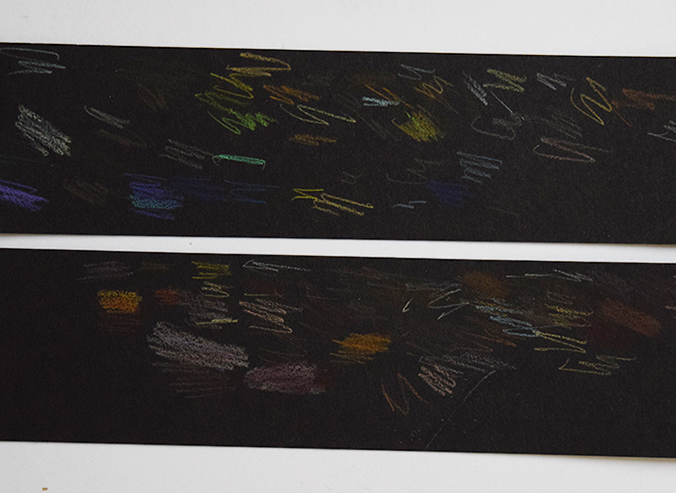
3. Keep a piece of paper on the side as a color test sheet
Colors do not always show up the same when you draw on normal white paper compared to black paper. This is because all colored pencil cores are made with pigment mixed with a binder (either oil or wax). Depending on the concentration of the pigment and the type of binder, drawing on black paper isn’t as vibrant and rich with some colors compared to others. For example, I’ve found that with Prismacolor, many of the yellows are very weak, while the blues most often appear true to color.
Making a small swatch of color on the test sheet will give you a good idea of what the color will look like on your actual drawing. Also use the test sheet as a “palette” and experiment with mixing colors via layering to get the perfect color.
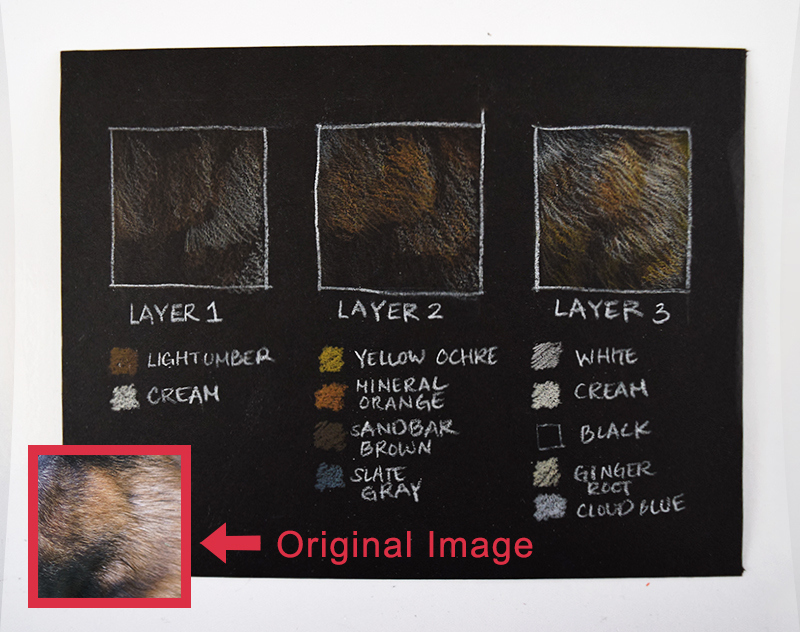
4. Build detail by working in layers
A huge part of drawing fur is to create layers of color which eventually translate to layers of fur. Aim for drawing from general to specific. By that I mean squint at your reference photo until it looks blurry. Draw those larger areas of color in first. Then after the first layer is down, go in with the finer details.
The colors I used in my fur demo were from Prismacolor. Prismacolors are a great brand and the lighter colors show up especially well on black paper. Prismacolor pencils can be purchased in affordable sets ranging from 24, 36, 72, 132, to an impressive 150 set.
5. Treat your black colored pencil like an eraser
It took me a very long time to realize that your black colored pencil is equivalent to an eraser! Totally mind blowing. And because a sharpened black colored pencil has such a fine tip, you can achieve a lot more accuracy than any small eraser. Try it. This technique is most effective when it is used on small areas.
Don’t be too hard on yourself if the first drawing (for me it was the first dozen) don’t turn out exactly how you envisioned it. As with all art mediums, there will be a learning curve. As you put more time and practice into it, you’ll get exponentially better. I like to keep my very first drawings in a portfolio along with my more recent ones. Periodically I’ll flip through it to see how much I’ve grown.
Are there any tips that you’ve discovered while drawing on black paper? I would be very excited to learn new techniques. Please comment and share them below!
Materials in this article are listed in the order featured below (may contain affiliate links):
- Strathmore 400 Series Artagain Pad, Coal Black, 9×12 inch Glue Bound, 24 Sheets
- Canson XL Series Black Drawing Paper, 7×10 Inch, Black, 40 Sheets
- Pentel Clic Retractable Eraser with Grip, Assorted Barrels, 3 Pack
- Prismacolor Premier Colored Pencils, Soft Core, 24 Pack
- Prismacolor Premier Colored Pencils, Soft Core, 36 Pack
- Prismacolor Premier Colored Pencils, Soft Core, 72 Pack
- Prismacolor Premier Colored Pencils, Soft Core, 132 Pack
- Prismacolor Premier Colored Pencils, Soft Core, 150 Pack (complete set)
thanks for the information
Nicely written. I will try this.
Cool article with helpful tips!
I would be careful with using the black colored pencil as an eraser though. The black can be darker than the black paper and leave ugly little marks on the drawing that are quite prevalent.
I’ve just released a video on the same topic. Many tips are actually the same as yours. Check it out here:
https://youtu.be/MG9fQEKyC8g
Your tips were great though everyone has their own style. The tip of using a black pencil as a eraser was good but one better be careful how much pressure to apply.
Great points Arushi! Thank you for taking the time to read.
Tank u for dat info. I needed dat for a friends b day present
i personaly think white should be used first. i have always gotten stunning results with it.
Thanks for sharing your process Mike! I’ll give your method a try the next time I use black paper. -Lauren
I think it depends on your style. Pushing and pulling the form is the same process. I start with a more neutral shade and pull it forward with white, then push it back with black when done on a white canvas (paper). With this medium I can see how you can start with the highlights then fade off into darkness. However I do like room to make that extra “pop” at the end 🙂
Thanks for sharing your drawing methods Jefferson! My post was intended to help new artists with a few tips on how to start working with black paper. There are lots of techniques with black paper that would work well for intermediate and advanced artists that I haven’t covered here.
Been looking for basic chewable bites of info on how and what to use on black paper. I’ve spent a lot of time on Google and Pinterest and very inspiring but still little on technique ideas etc at basic or can be used to expand knowledge base as you have shared here. I experiment a lot and decided to tackle some black paper for fun but hadn’t a clue what to use besides chalk pastels, metallic paint/pencils etc and a white pencil lol. I have the Carson one bc just wanted to dip my hands in this exploration but wishing for mixed media black. I got my Carson at Amazon but couldn’t find other mixed media black pad options!!! I’m glad to see your suggestions paid or not hahaha! Hey starving artists need whatever one can get! Anyways, I’m not huge on reviews and comments but felt the need to comment and thank you as this is the first most practical suggestions I’ve seen after much perusing!
Thanks for reading Issadora! I’ve used Strathmore’s black paper for years now (not sponsored, but I wish I was!). For metallic paints, the brand “Stonehenge” recently came out with a heavy-weight black watercolor paper which would probably work really well with the mixed-media. I don’t have personal experience with that paper, but I have used some of their other Stonehenge papers for printmaking. It’s a quality brand that might be worth looking into if you can find it. 🙂
I am a beginner at drawing on balck paper. Thanks for the tips. Truly helpful
Thanks for reading Corren! I hope you enjoy creating with your new supplies.
Hello! Getting ready to try colored pencil on black (Canson smooth side pastel paper) nice to read this before I go at it!! I want to do a Xmas card with my daughter’s favorite Xmas ball on black.
Read somewhere white pastel can be applied as a base under CP but not much detail. Have you tried it instead of white colored pencil? will have to experiment!
Thank you.
Hi Mireille! I have used pastels and colored pencils together. I personally feel that the Canson black paper is a bit too smooth for pastel work. Typically pastels need a textured surface to cling onto (or else the pastel will easily smudge or fall off the paper). When artists use pastels and colored pencils together, it’s usually to save some time because you can apply color much faster with pastels.
If you already have some pastels, it wouldn’t hurt to try combining the two materials. I would recommend applying the pastels with light pressure and blending the pastel into the paper with your fingers. If you don’t have pastels on hand, I wouldn’t worry about purchasing pastels just for one project. You’ll be able to draw your card just fine with colored pencils and patience. Good luck!