Thought it was about time that I attempted to make an in-depth tutorial. As with all tutorials, you do not need to copy every step 100% to achieve the same results. This tutorial will outline how I commonly approach drawing eyes.
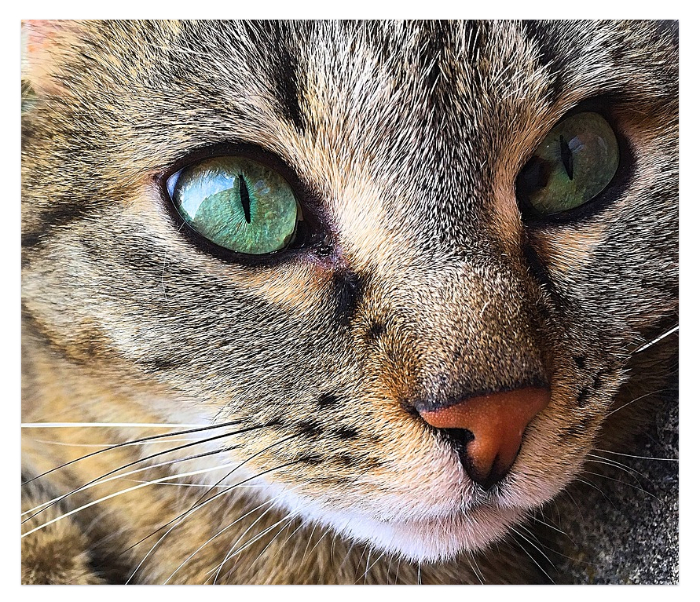
The reference image was a royalty-free picture by Sarah Loetscher from Pixabay. To download the high-resolution image for your own use and follow along with this tutorial, the link is here: https://pixabay.com/en/cat-mieze-tiger-animal-eyes-2367174/
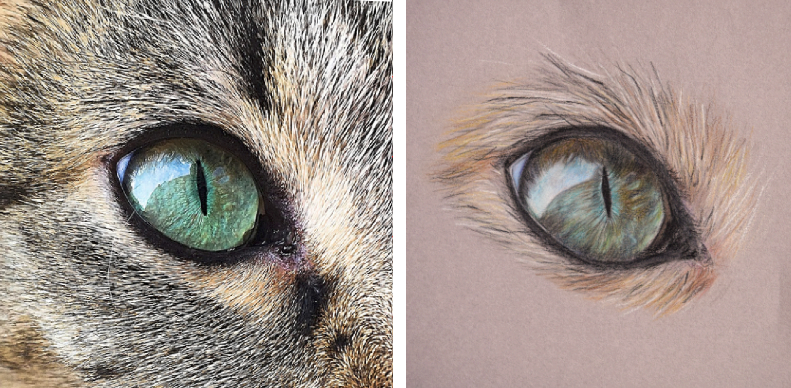
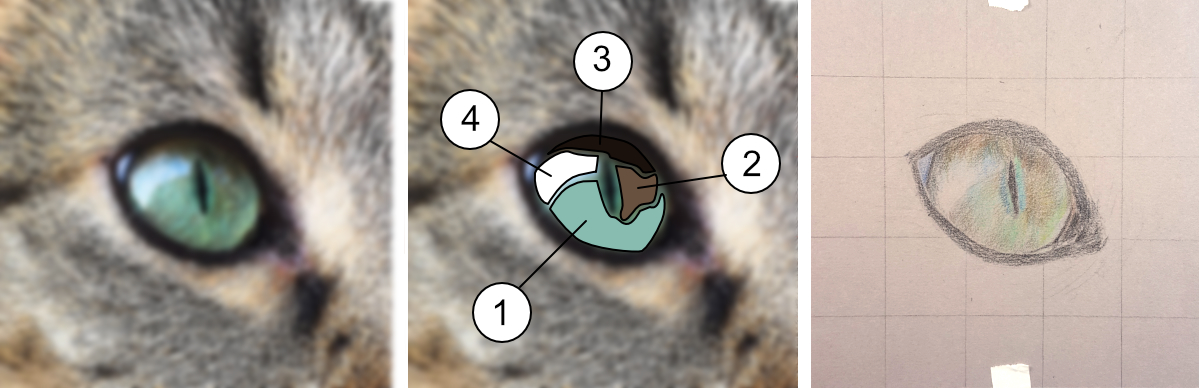
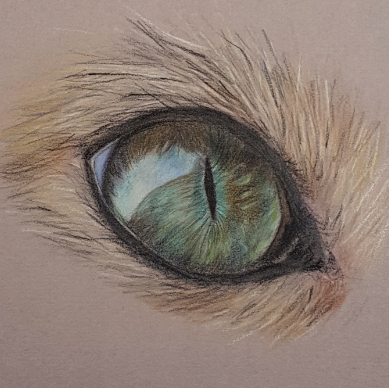
I chose this image because it had several elements that I think are tricky to tackle.
- The Iris (green-colored areas of the eye) has a wide range of values and hues which can be intimidating to draw
- The reflection from the lighting on the Cornea (outermost layer of the eye) is clear and also has a bit of sky reflected in them.
- The upper lid and fur near the upper lid casts a darker shadow that is often overlooked
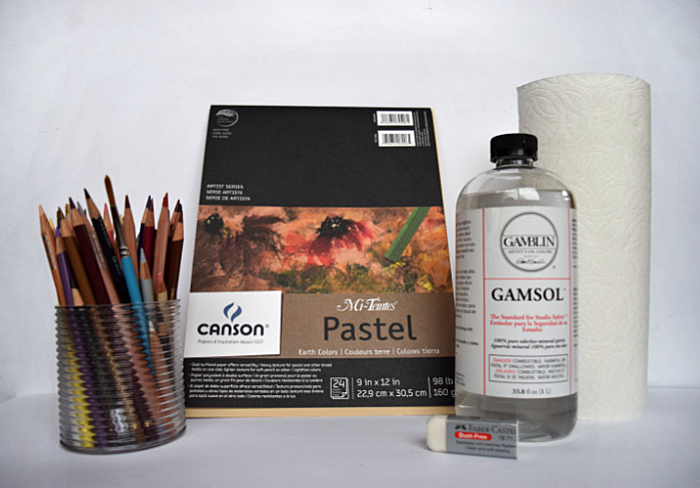
The materials that you’ll need:
- Pencil
- Eraser
- Colored pencils
- Paper
- Gamsol (or odorless mineral spirit)
- A small stiff synthetic brush (I used the Princeton brand Select brushes)
- Paper towel (to wipe off excess Gamsol)
Now for the tutorial!
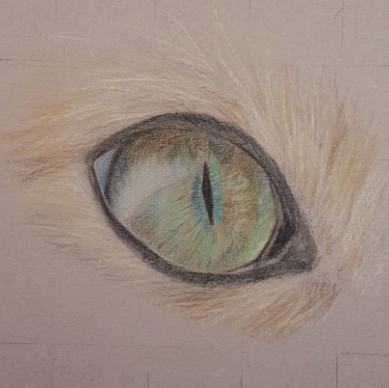
- Any good colored pencil drawing starts with a good foundation. When you start sketching your eye, make sure that you’re paying attention to these important landmarks:
- Relative heights of the inner and outer corners of the eye
- The highest and lowest points of the eye
- Where the Pupil (black area in the center of the eye) sits relative to the eye
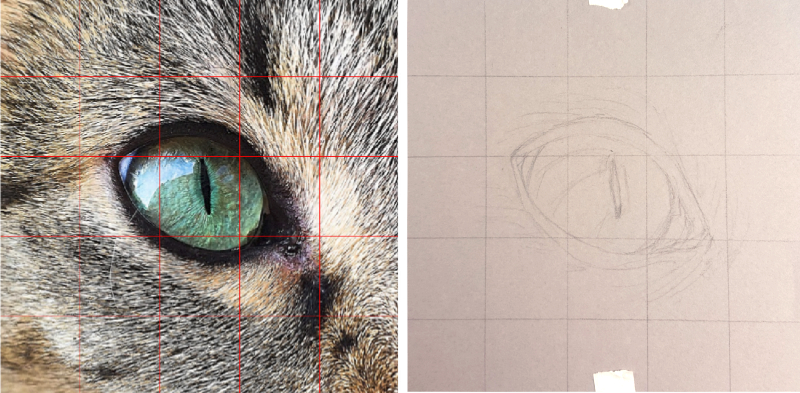
I use the ‘grid method’ of accurately drawing my subject. If you’re unfamiliar with the grid method, here’s a great article on it: https://www.art-is-fun.com/grid-method/
2. I know it’s tempting to head straight in with the details, but we’ll get to that eventually. When you’re first starting to apply color, the method of going from general to specific often gives the best results. To see the “general” picture, squint at your reference image until it looks blurry. Identify the large areas of color.
With this image, I used 4 main colors, (1) a pale green for the lower half of the Iris, (2) medium brown to the right of the pupil (3) dark brown for the upper areas of the iris near the upper lid (4) light blue in the reflection on the cornea
3. I use Gamsol as a tool to smooth out the color in the early layers of my drawing. It helps to remove the texture that you often get as the colored pencils tend to not fill in all the nooks and crannies in the surface of the paper. Gamsol is best used sparingly with the brush just barely wet. I dip my brush in Gamsol and then wipe it on a paper towel to remove any excess
Gamsol will appear to darken your drawing, but this is only temporary. As it dries, your colors will return to normal. Gamsol takes anywhere form 10-20 minutes to dry completely. Avoid drawing on the areas still wet from Gamsol. The surface texture or tooth of the paper can be easily damaged if you try adding more color while it’s wet. If the paper feels cool to the touch, it’s probably still wet. Wait another 5 minutes before testing again.

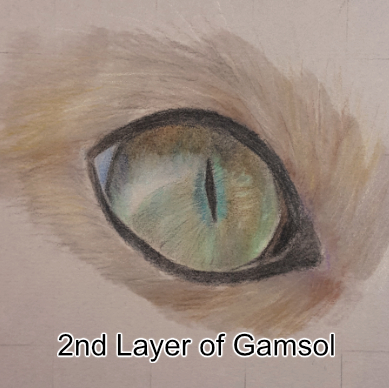
4. Once your eye has been filled in with its first layer of color, it’s time to build up color in the second layer. I deepen the color for the brown areas and used some lighter and darker teal colors for the pale green area. Variation in color gives the eye much more interest. Remember that it doesn’t need to be 100% accurate for it to look natural. In fact, nature has randomness built into it!
5. You guessed it, the next step is to add more Gamsol. Make a cup of tea or grab a snack while you’re waiting another 15 minutes for it to dry.
6. It’s now time for the third layer of color. At this stage I like to concentrate on color saturation. We’ve established the color hues in layer two. In layer three I use light and dark greys to reduce saturation. By lowering the saturation in areas, it’ll make the bright areas of the eye seem even more bright in comparison.
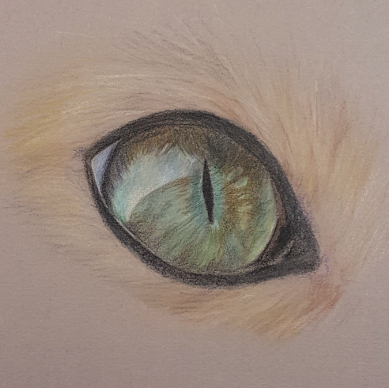
7. Now that we’re down to the final layer, it’s detail time! In this layer, it’s important to keep your pencils very sharp so that the details will go exactly where you want them. At this point the paper is also fairly loaded with color, so a sharp pencil will help you layer on top of the existing layers of color more easily.
In this layer, I’m mainly working with very dark colors (black, dark brown, dark blue) and very light colors (light blue and white). Most of the middle value colors have already been laid down in the previous layers. This final layer typically takes much less time because I’ve done all the hard work in my earlier steps.
And now you’re done!
Some additional tips that you may find helpful:
- Apply light pressure in the earlier layers and gradually add more pressure in the later layers.
- Gamsol isn’t a requirement, but it does make it easier to blend color. You only need a teaspoon for a small drawing. I transfer a little bit of Gamsol into a small airtight container and close the lid whenever it’s not in use.
- Keeping your brush clean is important to prevent colors from ‘muddying’. After blending one area, I’ll dip the brush in Gamsol and wipe it off to remove any pigment hiding in the bristles.
- Stepping away from your work is a good way to evaluate if you need to make adjustments. I stand back 5 feet from my drawing about every 30 minutes.
Congratulations on making to the end of the tutorial. I hope you’ve found one or two things that may help you in your future drawing endeavors. Patience is key with drawing realism because it always takes much longer than you expect. All drawings start out rough so keep going until you’re satisfied with the results.
Please leave a comment if you’ve found this tutorial useful, or if you would like to request a specific tutorial on a different subject.