My first “real” post will be focused on how I prep my artwork for shipment. I’ve read dozens of forum posts, watched countless YouTube videos, and visited other artists sites gathering the information that I’m going to hopefully recap in a concise manner.
As an artist, shipping artwork is stressful. It’s devastating to think that the artwork I spent hours on might get wet, bent, or even lost in the mail. I’ve successfully shipped a dozen original pieces to date (two of which were international). There have been no issues so far with my packing methods, so I want to share my knowledge with you.
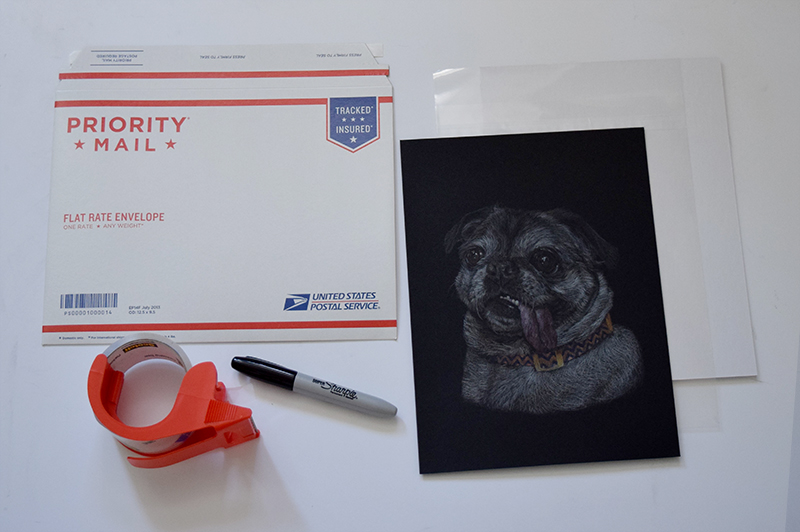
Here are my main packaging materials. Specific brands that I use are listed in [brackets].
- Flat cardboard mailer
- Matboard (a sturdy cardboard) [Clearbags.com]
- Clear plastic sleeve [Clearbags.com]
- Packing tape [Scotch Heavy Duty]
- Bold permanent pen [Super Sharpie permanent marker]
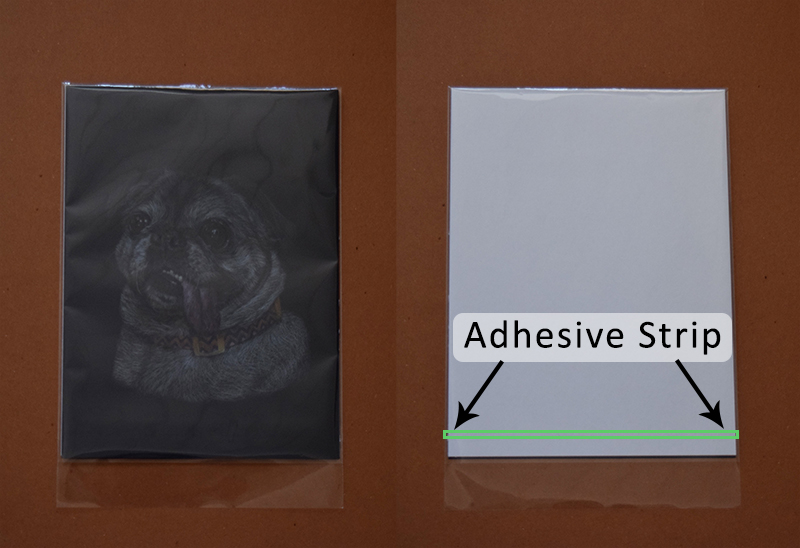
Each drawing is paired with a matboard and placed in its own plastic protective closure bag. I went through the extra effort of finding matboard and plastic sleeves that are both acid-free. Acid-free means that, during the manufacturing process, the material was neutralized to a pH of about 7. Therefore, the material directly in contact with the artwork will not damage or discolor it. If the drawing will be given as a gift or will be framed at a later date, the drawing can safely stay in its plastic sleeve.
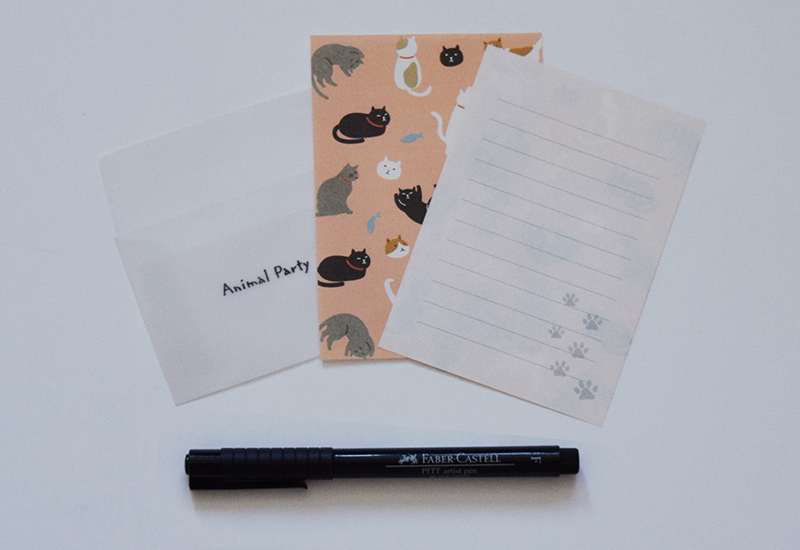
In addition to the packing slip and artwork, I also include a personalized hand-written thank you note with every order. I saw that several other artists do this and it’s a nice touch. My thank you letters are not fancy (confession: I buy them from the dollar store), but taking the time to personalize each order can be a great way to reach out to your customer.
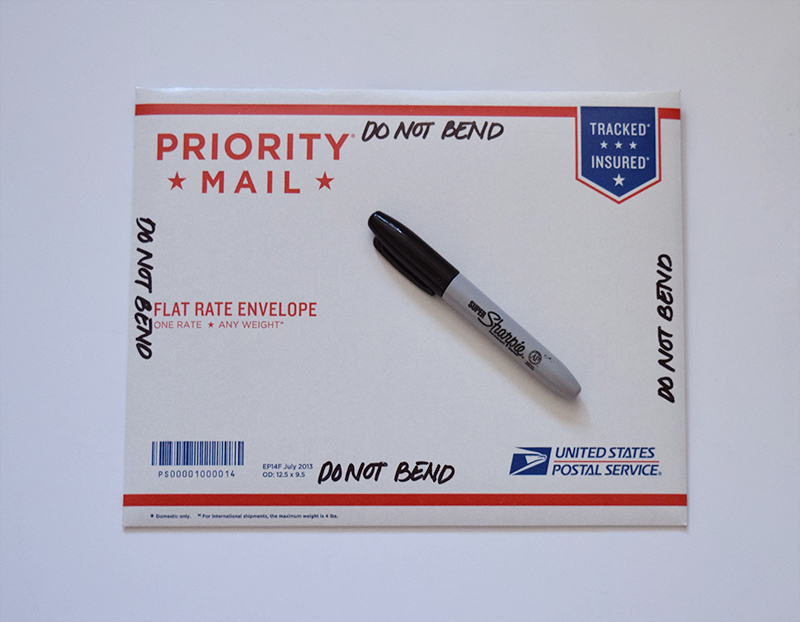
I write in permanent marker “DO NOT BEND” on all edges on the front AND back side of the envelope. Just in case the mail man doesn’t see the first four DO NOT BEND markings, he’ll definitely see the fifth one. This seems like an unnecessary step but just look up “do not bend fails” and you’ll see what I mean. If you want to splurge, Amazon and Etsy sell stamps and stickers with similar markings.
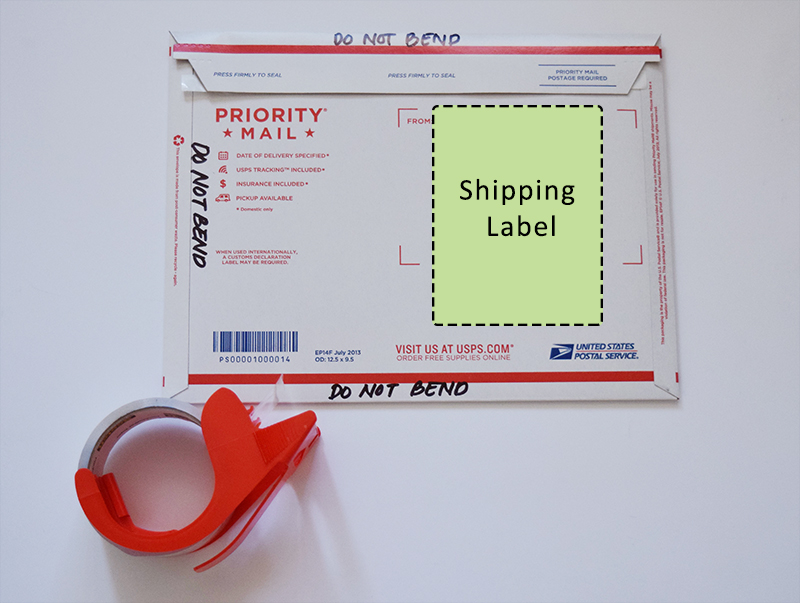
I securely attach shipping label to the the package. One day I would love to own a label maker, but for the time being I print it from my normal inkjet printer and cut the label to size.
***Tips for artists mailing their own artwork***
1. Picking the right packing material
The number one piece of advice I have for people shipping prints or artwork is to DOUBLE CHECK your dimensions. If you have a 8”x10” drawing, do NOT buy a 8”x10” mailing envelope. You need at minimum a ½ inch margin between your artwork and the envelope. Without this gap, you risk the possibility of crushing your art while loading it into the envelope. Also, your customer will very likely have a difficult time removing the artwork from the packaging.
The same principal applies to the clear plastic sleeves. I ship 8”x10” and 9”x12” drawings. Therefore, my plastic bags are 8-1/4”x 10-1/8” and 9-1/4” x 12-1/4” respectively. The ¼” ‘wiggle room’ allows space for the matboard backing. Even if you decide to forgo the matboard and prefer to only put your artwork in the sleeve, there’s a chance that the side seams of the plastic will tear if you purchase a plastic sleeve the exact dimensions of your artwork.
If possible, go to a packaging store (ex. UPS, FedEx, USPS) in person and do a “test fit” with all the items you plan on shipping. Sometimes online companies are willing to send samples to you so you can try out their products before committing to purchasing a case.
2. Calculate your packaging costs
In general buying in bulk will be cheaper than purchasing items as you need them. At the beginning of opening my Etsy store, I bought supplies as I needed from the nearest office supply store. I later did the math and found out 10% of the cost of the item went towards just the packaging! Once you find quality supplies that you like, it’s definitely worth it to purchase by the case. It’s a higher upfront cost, but the overall savings can be very significant.
3. Pretend you’re the customer
This may be an obvious thing for some, but I’m going to say it here anyway. Pack your items so that it makes a good impression on the customer. Pretend you’re the person opening the parcel at the receiving end. Small things I’ve taken into consideration:
- Use tape to secure things, but not so much that it makes it difficult to open
- Have a dedicated shipping area (no food or drinks allowed here!). Coffee and grease stains should not be on anything that you mail out.
- Double check spelling. Your client’s name should be correctly spelled on the packing slip, shipping label, and on the thank you letter if you choose to write one.
Have any tips or packing tricks that you would like to share? Did you enjoy any of my tips? I would love to hear what you have to say in the comments.